What’s a blog post in its purest form? A bunch of paragraphs of text. But if your blog post really is just that, would it reach a big audience?
Most of the time the answer to that question is no. You will need to add points of interest to your blog post to reach a bigger audience. There are quite a few ways to do that, here are a few examples:
- Create an emotionally capturing headline that makes people click (See here for more information)
- Use storytelling to better draw your readers in (storytelling is a spectacular tool – see this example)
- Underline your point of view with statistics and numbers (aren’t we all victims to the power of big numbers?)
There are many more ways to enrich your blog posts with elements capturing the attention of your readers. One of the most powerful tools that should be in any bloggers repertoire is adding visually appealing elements (called images and graphics) to your posts.
According to Quicksprout,
Before you read on - we have various resources that show you exactly how to use social networks to gain massive traffic and leads. For instance, check out the following:
FREE Step-by-Step Twitter Marketing GuideFREE Pinterest Marketing Ebook
- Content with images get’s 94% more views than content without!
- 94% equates to almost double the number of views – and this boost is noticed across all topics and categories!
- Tweets with images on Buffer receive 150% more retweets!
So if you want a consistent traffic boost, adding graphic content in the form of images might be a really good idea.
But there are a few things to keep in mind to do this right.
- Images at their core are a way to enhance your storytelling – by highlighting important points of your article, adding an emotional component and adding credibility.
- They also help in breaking up your content into blocks that become more readable to the stressed eyes and brains of your readers.
- Images make your post more shareable and also prepare your post for those social platforms that require images (like Pinterest).
There are basically 5 types of graphic content that make sense to add to your blog posts. Use them wisely!
Image type #1: Images highlighting big numbers and statistics
When we quote statistics to emphasize our points of view, we all appear more credible. At least most of the time.
And here is the absolute kicker: This is even true if we quote statistics that we didn’t create ourselves! So when you write your blog post, add a little bit of research to it – if you cannot do your own case studies and graphs, you can Google around and find some that somebody else did. Just remember to quote the original source.
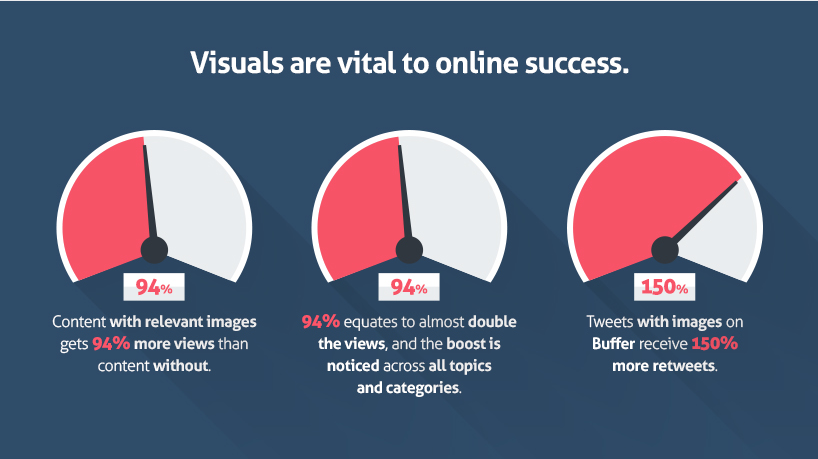
Posts with image content compared to posts without. Source: Quicksprout
But then, also create image content based on these statistics – like the image on the side, that both serves as an example for this type of image, adding research and statistics to a blog post and a reminder to always link to the image source and the provider of the research. 🙂
These types of graphics are easy to create with the tool canva – see tools list below.
Image type #2: Illustrations and Screenshots
Illustrations are a way of pressing complex topics and points of view into images to make them easier to understand and digest.
Now, I understand that you don’t have a graphic designer or amazing drawing skills at hand to create your illustrations, but there are still ways to illustrate your points with graphics. The beauty of illustrations is that they don’t need to be graphically perfect – they just need to illustrate your point.
Hey, before you read on - we have in various FREE in-depth guides on similar topics that you can download. For this post, check out:
FREE workbook: CREATE AWESOME BLOG POSTSFREE Beginner's Guide: START A BLOG
Do you remember a time when you were at school? A good school teacher was never the teacher that could draw perfectly – a good school teacher was always the one who could draw a couple of lines onto the whiteboard which may have looked awkward but illustrated his point so perfectly, that your jaw dropped and what didn’t make sense before suddenly made perfect sense to you – his pupil.
You can achieve the same effect with even the simplest of illustrations.
For example: Above, I made the point that images help breaking up your content into blocks that are easier to consume – similar to headlines. (In fact, many bloggers use one image per headline.)
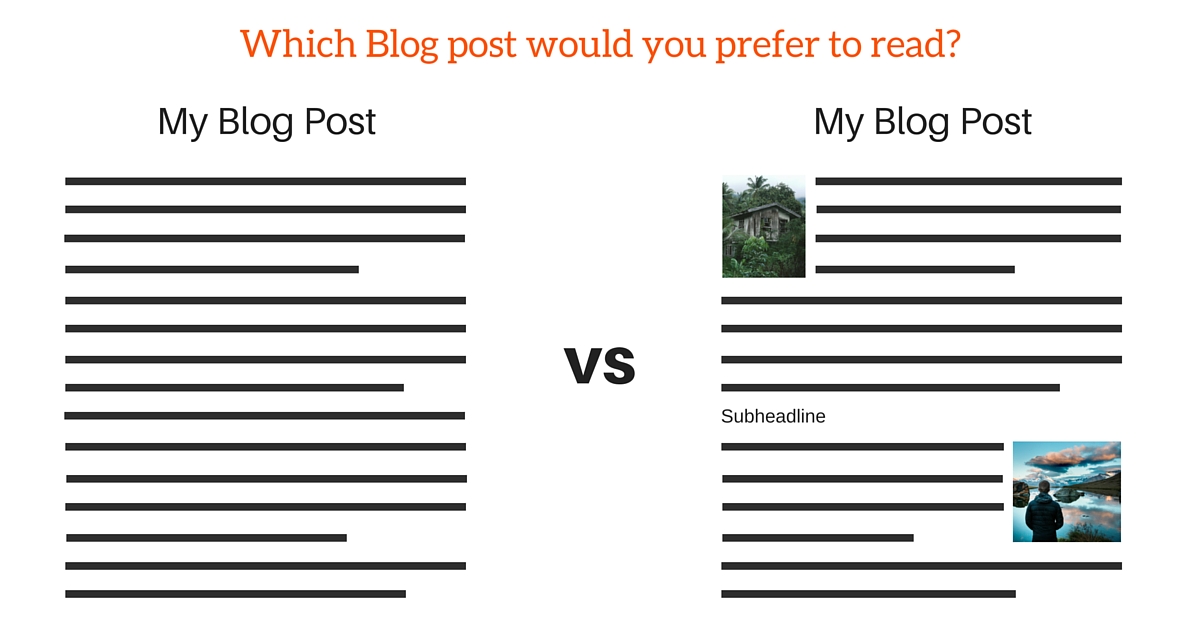
Blog posts with image content are easier to read and more pleasing to the eye.
To make this point more clear, I have created this little illustration on the right. This took me only a couple of minutes – and, I am no Photoshop wizard. In fact, again, I only used the tool canva.
Often also a really good tool to illustrate a point are screenshots. See the next image type for some examples of screenshots (see the part about Pixabay)
Image type #3: Photos as examples and illustrations of the topics in your article
Sure, graphics and illustrations are great, but sometimes you need to use an actual photo. For instance, if you are writing about recent news, but also to illustrate certain points, show of products, etc.
Using photos is sometimes a bit tricky – are you allowed to use certain photos or not? Do you need to take your own photos of certain products? Should you buy stock photos?
For products, most of the time you can simply take photos from online shops and link back to their sales page. Or you even sign up for various affiliate programs and take images from there. But what if you write an article about the art of coffee grinding and need some images for that?
Sure, you could pay for stock photos – but that could become expensive soon, right? Well, there are some websites of the web with catalogues of free images that you can search – and for a completely random example of how to get free images, let’s use Pixabay (a site for completely free stock images) to find some free images for the above example of coffee grinding:
As you can see, searching for “coffee” and “coffee grinder” should give me enough visual content for any article about coffee grinding.

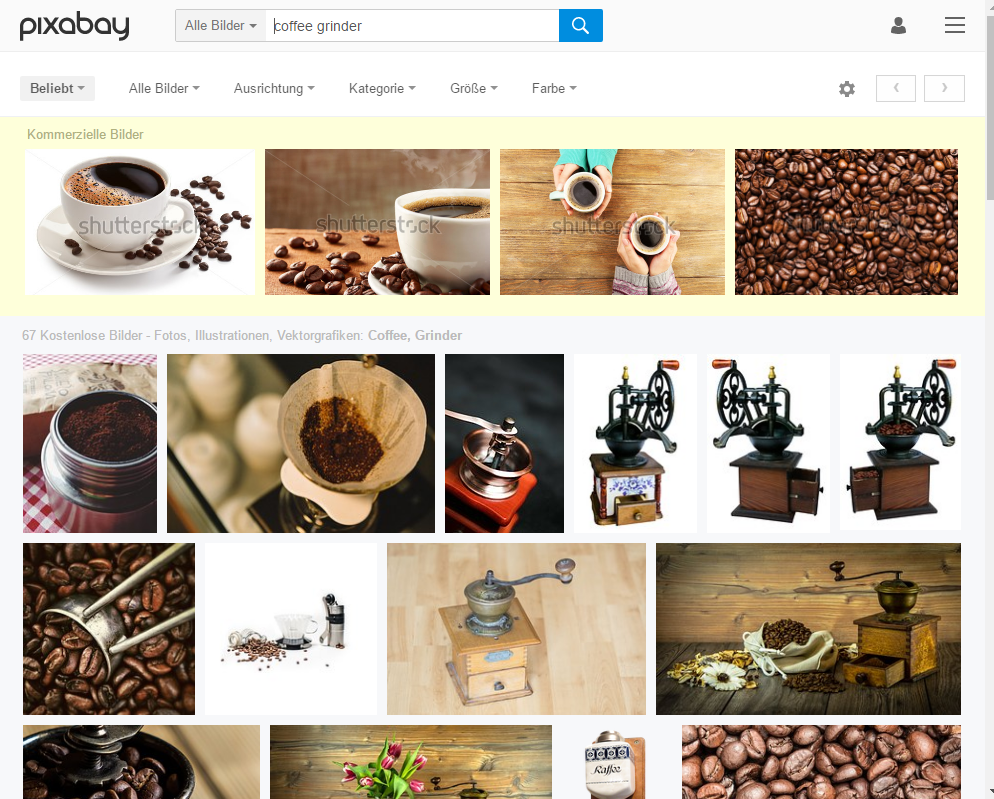
There is not even anything to create here!
Image type #4: Social media optimized images
Almost every social network these days has it’s own ideal image size. Sometimes it is very clearly defined, like on Facebook, sometimes its definition is a little broader, for instance that the height should be greater than the width on Pinterest.
Hubspot has an infographic on the ideal image sizes for various social networks.
Sometimes it makes sense to hide the actual image for a specific social network and make it only appear when someone uses the specific share button, but most of the time you should add these to your blog post directly – why hide if you have graphics?
For instance: This post has a cover graphic, that is also used as an image for Facebook sharing. we also created an image that is ideal for pinning, which you can find next to this paragraph!
Images on social media sites work best, when they make an emotional connection to your reader. Very often, bloggers use quotes on visually appealing backgrounds for these types of images, but sometimes a visually appealing photo just does the trick.
Image type #5: Completely unrelated images that only relate to the image on an emotional level
Sometimes, it helps to make the emotional connection to the reader with the use of photos or images.
This art has been perfected by the list-post-optimized website Buzzfeed: Many of it’s posts feature unrelated images to make an emotional connection for the current list item.
While this strategy may seem completely unnecessary – it can be valuable to break up your posts into easier to read parts and include for instance a little bit of humor into your posts.
Sure, I wouldn’t buy stock images just for this purpose – and including cat images at the side just to appear humoresque will make you look desperate (just like me, as I found it clever to include a cat picture next to this paragraph).
 But sometimes this strategy is invaluable: On personal development articles you will find a lot of relaxing landscape images – that really help to convey certain feelings to the reader, and there is nothing wrong with that.
Just don’t cross the line between “emotional connection” and “desperation”.
Learn to get more out of your social media efforts: Generate traffic, leads and sales with the ebook “The Social Traffic Code!”
Enough of the image types – how can you create these images?
Sure, adding images to articles can be a tiresome task. Bigger companies and social media managers seem to have graphic designers on speed dial – yet there are ways for you to tackle these image creation tasks yourself.
All images in this post have been created by me, while I was writing it. It can be done – and you don’t need to be a photoshop magician to handle it.
Here are some tools I regularly use:
Pablo by Buffer
Pablo is probably the easiest image creation tool I’ve ever seen. And in this case, easy does mean limited. The point of Pablo is being able to create a visually appealing image fast.
And that means the point of Pablo is not being able to create exactly the image you want!
Pablo comes with very few but effective options:
- Using a template
- Using a background image from Pablos selection
- Uploading a background image
- Using a few predefined image filters
- Placing a maximum of three text boxes on the background image
- Adding a logo to your creation
Any task that is more complicated than this, and Pablo is not the tool you need. But it’s the clever selection of features that make Pablo useful. If you need a good looking social media image fast, Pablo is a tool of choice. It takes the colors from your background image and logo and gives you good looking color combinations by default.
You can select from various fonts – but you are not even able to rotate text boxes.
However, Pablo’s results are almost always visually pleasing. If there is one thing I would change, I would add more image sizes – as it is images are either optimized for email, Facebook and Twitter or Pinterest.
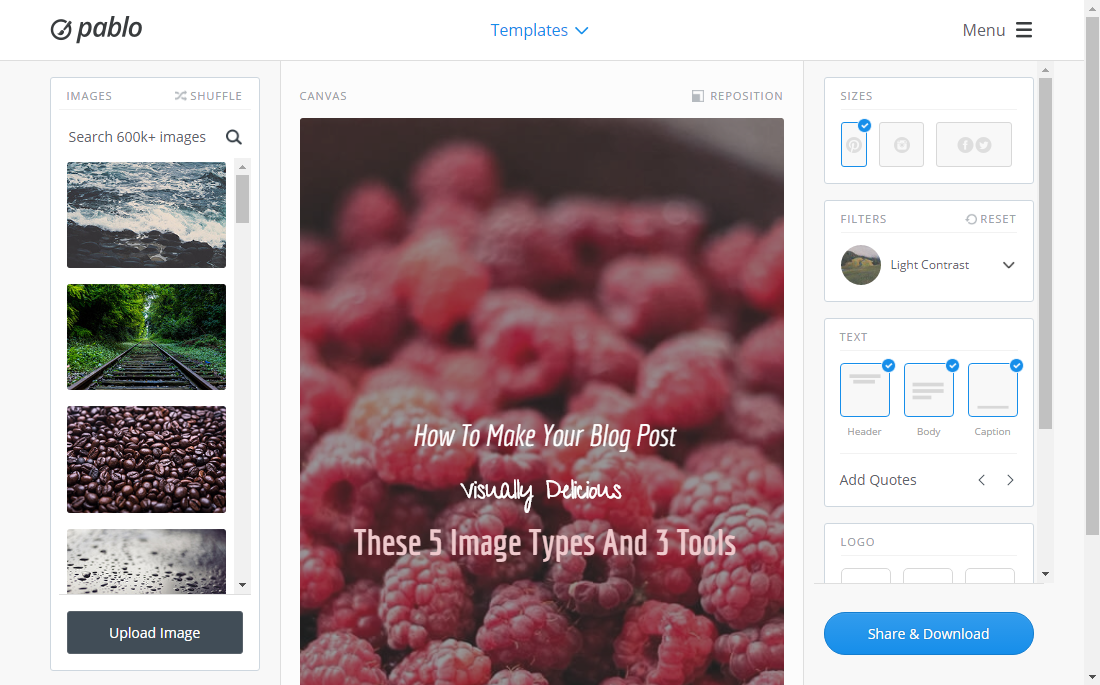
Pablo is a great tool to quickly create social media optimized images
The pin image of this post was created in Pablo.
Canva
Canva is a bit like Pablo, just with a lot more options, templates and even manual control. Canva claims to be the easiest graphic design tool on the planet – and this claim might hold true. It does feature a lot of Pablo’s ease of use – yet having more options does sometimes come with additional time needed to complete an image.
However – this isn’t a problem, if the results you can get out of it are just so much better that what you would get with Pablo.
Some of the graphics and illustrations in this post were created with Canva – and almost all the graphics we create ourselves are done in Canva. It’s capabilities range from social media images and book covers to even full blown infographics. You can use one of their templates (free or paid) as a starting point or start designing from scratch.
You can add some of their paid assets to you images if you want to or you can use only free design elements.
Canva also has an area on their site which you can use to learn about design principles. When you dive deep into canva you will realize that it is actually a very powerful tool – which is easy to learn and use – yet your results will always improve the more you learn about it!
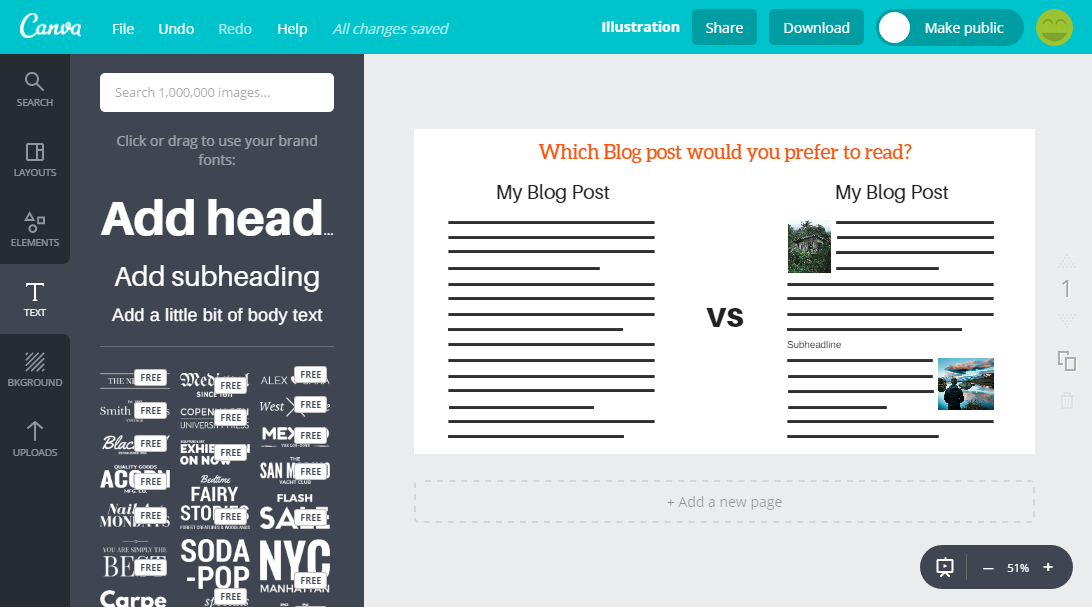
Canva offers more options – but it also takes more time to create an image in canva compared to pablo
The WordPress Plugin Image Inject
Two of the image types I told you were important are images. Image inject allows you to search sites like Flickr for Creative Commons licensed images that you can freely use on your blog and directly add them to your post.
It all works directly from your WordPress installation so it really is a massive timesaver: No more looking around the web for that one image you need!
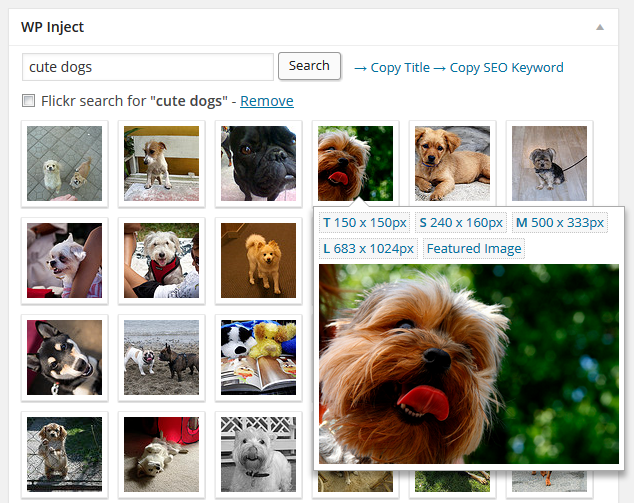
image inject – when you need more free photos for your posts
Final Words
Spicing up your blog post with images has a lot of benefits – but they do need to be visually pleasing to the eye.
Not so long ago, there was a lot of effort needed to really get good looking graphical content onto your site – but with these tools above, you can create most of the content yourself or find images to support your content on the web.
Do you want to create better blog posts? Do you want to learn about some types of blog posts you did not know? Do you need help to structure your posts in the best way?
Our Blog Post Templates help you with all that. Get 6 blog post templates for free. Download our blog post templates here!